OBLIGATORY DISCLAIMER:
Budget Vintage is an extremely open and diverse format with a huge card pool and an ever-evolving metagame. This Primer is not meant to be the be-all end-all on High Tide for Budget Vintage. It’s very possible that shortly after I publish this someone has discovered some hot new tech or something important got reprinted into a commander deck. If and when that happens I will be adding addendums to the end of this primer. Of equal importance, I am a lover of this deck through and through. It has a special place in my heart. But I am not the only person you should listen to. Check out primers and decklists for other formats, and other decklists for this archetype in the Budget Vintage discord. There’s a whole world of Tide out there. Go experience it all. You won’t regret it.
A Word of Caution
One day, many moons ago, I woke up and decided I wanted to start thinking about Budget Vintage High Tide. And since then I haven’t been able to stop.
This is a warning. If you are a lover of combo decks, more specifically storm decks and you enjoy your peace of mind, turn away now. If you like listening to your loved ones speak without thinking about Gifts Ungiven piles and Mind’s Desire probability run. And run fast.
Still here? Good. You’re stronger than me.
First, some context.
Back in the silver age of the format (circa 2019), my friend and I discovered that many of the pieces to Legacy High Tide were cheaper than we thought. So we got to brewing. We ended up with a decklist that was far from optimized, and never performed particularly well. Sure, it killed people. But it would not be the first deck I’d think to bring to a large event. But good lord if it wasn’t a fun building exercise. I had played UR storm in Modern a decent amount, but Tide plays nothing like pretty much any other storm deck in the game. I fell in love immediately.
I started delving into the deck in legacy, proxying it up for local events (since I was still a poor teenager) and I loved it. I can’t say that I was winning much with it, but I was having more fun playing magic than I had in quite a while. When Budget Vintage and Magic as a whole hit a wall in 2020 I stopped thinking about the game for a while almost entirely, but Tide never left the back of my head.
Flash forward to 2022 and Budget Vintage is back in full swing! Many of the important pieces to High Tide had steadily climbed in price since the good ol’ days, making the deck borderline unplayable. But luckily Mark Rosewater heard my cries, and delivered upon to me Dominaria Remastered. High Tide was back on the menu. Rusty and I got to work on the deck, and he took it to a top 8 finish at our first large modern day event. He moved on to finding success with different decks, but I kept diving deeper and deeper into the rabbit hole. And haven’t stopped since.
A brief list of places I have made important decisions regarding deckbuilding:
- Seeing my favorite band live for the first time
- On the phone with my rental company
- Thanksgiving dinner
- Christmas dinner
- A first date
- A funeral
This is your final warning.
Here’s the decklist discussed. If you’re reading this in the future (After August 2024), here is the decklist I am currently playing.
The decklist discussed in this primer is a good bit different from the one I’m playing currently. The information here is still valuable to help understand the deck more intimately, but if you’re purely interested in the list I’m playing now and how it differs from the discussed list, check out the addendums section here.
I’ll pray for you.
What the Hell Even is High Tide?
High Tide is a mono-blue storm combo deck first arising to popularity thanks to the legendary Kai Budde, who brought it to victory in the Extended format at Grand Prix Vienna in 1999. One of the most powerful Extended decks of all time, it operated much like today’s versions. The main game plan is to cast the titular High Tide, then string together multiple powerful untap spells courtesy of Urza’s Legacy to generate insane amounts of mana and cast a lethal Stroke of Genius (now Blue Sun’s Zenith) on your opponent. While Budget Vintage does not get access to staples of the Legacy deck such as Time Spiral, Brain Freeze, or Cunning Wish, we do get to play a variety of other powerful cards.
If you are a lover of storm decks there are few better options available to you in Budget Vintage than High Tide. It is the ultimate combo deck. You must be aware of every single choice you make from the first spell you cast until the absolute last. There are dozens of options for High Tide. What will follow is a hopefully coherent breakdown of my personal 75 cards. But I must make it clear to you dear reader that I am but a mere mortal man. I am confident in my decklist and have performed well with it. I know why each card is there in the quantity it is and as you’ll see I’m ready to defend them all. However, if what you take away from this primer is that you know a better way to build and play High Tide please take that inspiration and run with it! I’m constantly thinking about changing things up with old tech, new tech, underpowered tech, and everything in between. And if you do, please let me know. If I haven’t made it clear already I love this deck and love talking about it. Without further ado, let’s get after it.
Decklist Breakdown
Before we can get into the strategy of High Tide we need to understand where every card comes from, its place in the deck, and how it functions with everything else. More than most storm decks, Tide is a machine that only works when every piece compliments the others.
If you read my July 2024 1k Tournament Report you’ve already gotten an amount of this information already, but this will be my excuse to go even more in depth on things so strap in.
The Headliners
Most of these are self explanatory but they’re still worth getting into. High Tide and Sapphire Medallion are your engines. It is worth to note for the uninitiated, yes your High Tides do stack, they are symmetrical (watch out for counterspells), and Islands you play after resolving them will tap for additional mana. Medallions are a newer addition from Modern Horizons 3 and are an absolute game changer. Before the MH3 reprint the game plan if your opponent Surgical Extractioned your Tides was to wait until you had around ten islands in play, make a bunch of mana with Turnabouts, and pray a large Mind’s Desire found you some gas. Needless to say it wasn’t particularly hopeful. Not only do Medallions give us win conditions without our tides (which we’ll get more into later) but they also make our combo turns significantly more consistent.
Blue Sun’s Zenith isn’t only an extremely powerful draw spell, it’s also our win condition. Creating enough mana to Blue Sun’s your opponent for 60 is a surprisingly easy task once you know what you’re doing. Don’t be afraid to fire it off early though. Often the worst place Blue Sun’s can be is your hand. Casting it on your opponent’s end step to draw three, two, or even one card is often the right move. It’s a card that doesn’t really help us very much at all unless we A: Have excess mana to fill our hand back up or B: Have enough mana to kill our opponent. Neither of which are situations you’ll find yourself in when trying to get the ball rolling on your storm turn. Chances are extremely high that one or two random cards from your deck are going to be far more helpful in getting started.
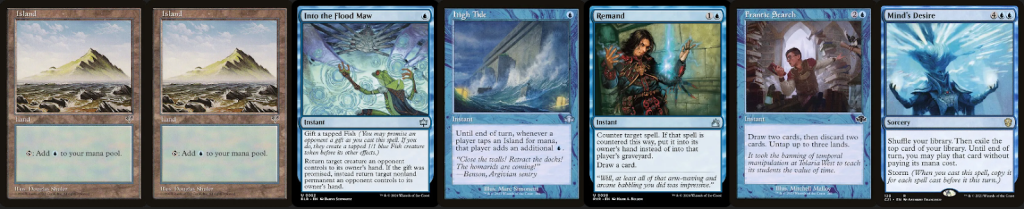
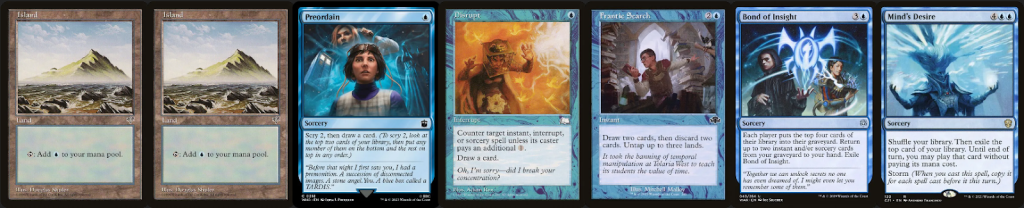
While Blue Sun’s Zenith is technically your main win condition, Mind’s Desire is your real win condition. I was initially worried that its unbanning in Legacy would spell doom for this deck’s budget, but luckily that format is a pit and nothing fun is allowed to be powerful. Thank goodness for us! The most common line of play to begin your storm turn will be something like High Tide, three or four untappers, some Cantrips, a tutor, and a Mind’s Desire for 7-9. More often than not this is more than enough to launch you to the stratosphere. When combined with one of the several ways to “rebuy” it, Mind’s Desire will often allow you to cast upwards of your entire deck for free. Making winning as easy as basic arithmetic. Important to note, make sure that when resolving your Mind’s Desire in a tournament setting you make it clear to your opponent that your original copy will be last and always, always stop yourself before you resolve that last one to see if there is either a way to rebuy it, or a way to dig for a rebuy spell at instant speed. Placing that mental stop on yourself will pay off in the long run, and can be the difference between sputtering out and winning the game.
It is worth keeping a broad idea of probability in mind as to the number of “dead” Mind’s Desire flips you have available. For this, we can refer to the teachings of Patrick Chapin’s Next Level Magic.
An important formula to help you calculate the probability of drawing a particular card is:
100% – (N/X)
Here, N = the number of cards that are not your “out,” and X is the total number of cards in your deck that are left. For instance, if you have 15 black mana and 53 cards left (seven are in your hand), then you are looking at 100 percent – (38/53) = 28 percent. If you have multiple draws, you actually multiply the odds of missing each time together, then subtract that total from 100.
Why calculate the odds of not hitting and then subtract from 100? That is because it is actually the best way to calculate the odds if you have multiple draws. Many people think that if you have a 20 percent chance to “get there” and three draws, that you have a 60 percent shot of doing it. This is actually not true, though. In reality, you have only a 49 percent chance if your deck had 50 cards in when you calculated the odds.
100% – [(40/50) x (39/49) x (38/48)] = 49%
I know this math is not for everyone, but it is included because you are going to want to be able to calculate your odds of drawing what you need in order to become a perfect player. Even if math is not your favorite subject, I strongly encourage you to learn this one formula as it is vital for high-level Magic play.
Remember, it is okay to round off to make math easier in your head! For instance, you could just round all of those fractions above to 4/5. It won’t be exact, but it will be close enough for the most part. Keep in mind that if your library has very few cards left, each card that you draw that misses greatly increases your odds of hitting the next time. For instance, if you had a one in five shot of hitting and three draws, but your library was only five cards, then the equation would look like this:
100% – [(4/5) x (3/4) x (2/3)] = 60%”
While Chapin discusses these formulas in the context of drawing a particular card at a certain point in the game, the same information can be used to decide whether storming off is worth the risk or not. Despite what Mr. Chapin might say, it is very much not integral that you get particularly efficient at these calculations to be able to pilot this deck effectively. But while goldfishing at home (something we’ll talk about later) getting into the habit of slowing down and asking yourself these questions as it relates to Mind’s Desire makes it much easier for you to make these kinds of decisions in actual matches. I don’t expect you to be able to run these numbers in a high-stakes game of magic right away. Hell, I’m not particularly good at it. But like anything, practice makes permanent. If you routinely do your Mind’s Desire math at home, and do it right, it’ll make figuring out your probability of whiffing in an actual game much easier.
Commit//Memory is a strange card that I have grown to love these past couple years. It performs triple duty in being interaction, a Timetwister, and a way to rebuy your Mind’s Desire. It deals with everything. A pesky sideboard piece like Damping Sphere, maindeck graveyard hate like Soul-Guide Lantern, or anything else you can imagine. The very worst case scenario is being fodder to a Frantic Search or putting into a Gift’s Ungiven pile to make your opponent squirm. There’s not many draw-7s available in Budget Vintage (at least ones that don’t end the turn) so getting access to even a suboptimal one is a game changer. Drawing seven fresh cards with just one High Tide active can often be enough to end the game on its own. However, do be wary of giving your control opponent seven fresh cards as well if they have mana available. If possible, tread lightly for your first couple spells after wheeling and try to gauge the likelihood of interaction.
Lutri is a particularly special card in that his real power lies in winning the game, which is something we will discuss in depth at a later point. But it is important to note here that outside of his game-ending potential he is an extremely powerful value piece. Copying a substantial Turnabout, a Solve the Equation to find Mind’s Desire + Remand, a Dig Through Time for insane card advantage, or any number of other options allows him to be a very flexible and very important piece to the puzzle. You will be reading much more about Lutri later, so I won’t talk your ear off about him now.
The Crew
2 Snap
Cloud of Faeries is an iconic High Tide card for a reason. It’s cheap, repeatable with bounce spells, cycles if necessary, and doesn’t get interacted with by opposing Thalias or Test of Talents. It and Lutri are the only cards that open us up to removal, which is not ideal, but the advantage Cloud of Faeries offers is more than worth it. It is often also an important role player for winning the game with Lutri, which again we will discuss later.
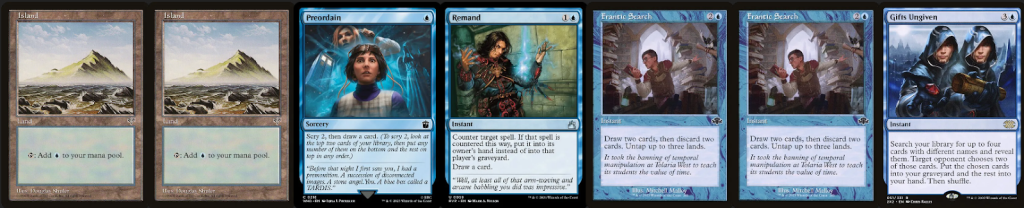
Frantic search is a fucked up Magic card. It’s banned in Legacy and Pauper for good reasons. A card’s floor being a free, instant speed, faithless looting is not okay. Frantic being able to not only net you upwards of sixteen mana when you cast it, but also digging deeper into your deck and getting cards like Commit//Memory into your bin is an invaluable resource. Before you cast your Frantic Search however, analyze your hand and your position in the turn. Do you just need the mana? What two cards are the most dispensable from your current position? What cards do you want to see and which would be the worst case scenario? What draws make discarding awkward? Are you better off casting something else first? Frantic Search’s stocks skyrocket the more cards you have in your hand, so it is often correct to get your regular draw spells out of the way first and give yourself more information to work with.
Snap is a deceptively simple card. It’s a free bounce spell that ends up being arguably the most flexible mana piece in the whole deck. Bouncing back your Cloud of Faeries is an obvious and powerful line of play but dealing with opposing Thalias or Anointed Peacekeepers, or even just a lethal attacker will allow you to not only survive, but kill your opponent from a position where they might feel safe. Luckily the fun doesn’t end there. I’m saying it a lot but Snap also helps win the game with Lutri and friends. But even outside of the game-winning combo, bouncing back your Lutri for any number of his aforementioned value lines is an a-okay use of your resources.
Turnabout is a necessary evil. I don’t love it and it often feels clunky, but dear God is it a powerful piece of cardboard. If you’re going off later in the game it generates truly asinine amounts of mana, but offensively it doesn’t really do much else. Where the other untap pieces have a variety of use cases and alternate lines of play, Turnabout is kind of a one trick pony. But it does that trick very, very well. If you’re manually making 53+ mana for a lethal Blue Sun’s Zenith it’s a key piece to that puzzle. What flexibility Turnabout does offer, it offers defensively. It’s easy to miss that Turnabout can target your opponent. Meaning you can cast it and tap down their lands or creatures, turning off interaction or combat respectively. It is crucial knowledge that Turnabout functions like Cabal Therapy. You declare who you are targeting when you cast the spell, but not what type of permanent you are tapping or untapping. Meaning if you are facing a creature deck that plays counterspells or hand attack such as Flash, casting your Turnabout at the beginning of combat step will force your opponent to figure out what you are trying to accomplish with this spell. If they allow it to resolve, thinking you are trying to save yourself some damage you can catch them with their pants down and tap down their mana without them being able to do anything about it. Even if they want to float mana, they have to do so before you decide to tap their lands. If you can help it, don’t give them any inclination to your intentions. Count the damage on board out loud if you have to. But make sure whatever you’re planning on doing they assume the opposite.
The Supporting Cast
4 Impulse
Preordain and I are good friends. We’ve been together for years and we’ll always have each other’s backs. It’s one of the most insane cantrips ever printed and even with its relatively recent Modern unbanning, it’s still here to stay. What’s there to say about Preordain that hasn’t already been said ad nauseam? It’s far and away our best cantrip option, even at its price point. If you end up really strapped for cash, you can cut some number of Preordains for an equivalent number of Sleight of Hands and not get too terribly punished.
Impulse falls in the Turnabout camp of a necessary evil. Is it the most efficient cantrip of all time? Far from it. Does it do exactly what it needs to do and does it relatively well? Absolutely. Being able to find a land or just an additional untapper to get your engine going is an important resource and Impulse is the best at doing it. It is also worth noting that the card feels insane when discounted by Sapphire Medallion.
Dig Through Time is one of the few restricted cards we get access to in High Tide. My list is not currently playing its brother Treasure Cruise (though I could easily be convinced to) as I’ve opted instead for the extra flexibility of Dig. Being instant speed is a huge deal. Allowing you to cast it on your opponent’s turn to sculpt a game winning hand is one thing, but also being able to cast it mid-Mind’s Desire to find a rebuy is insane. Please take some time to consider your Digs as well. When evaluating which cards to take, understand what it is you actually need to win the game, and which cards either accomplish that task or find the cards necessary to do so. It sounds obvious but taking an extra few seconds to figure out how the rest of your turn will play out depending on which cards you decide on can be the deciding factor in your match. At the end of the day though, Dig Through Time is another famously powerful card that you don’t need me to convince you on.
Alright now I hope you’ve been with me so far and trust my judgment on card choices. I need you to extend that trust a little bit further. I’m going to make an insane statement here and if you feel the need to lock me up I won’t hold it against you.
Trade Secrets might just be the best draw spell in the deck.
Come back come back!
Hear me out.
You’re sitting here thinking to yourself “Everett you’re insane! I don’t want to give my opponent cards! They will use those cards to kill me! I’ll lose the game!” And I agree! I don’t want my opponent to have cards, that usually sucks. But you must remember for a moment that in Budget Vintage there is next to no free interaction we have to worry about. No Force of Will/Negation, Mindbreak Trap, Mental Misstep or anything of the like. Occasionally you’ll see a stray Disrupting Shoal but those are few and far between. If you plan on winning the game the same turn you cast it, Trade Secrets often takes the role of a less risky Meditate. If you’re playing against a deck that doesn’t have too much disruption and you’re not under much pressure, just slamming it on turn three to untap and win the next turn ends up being a far more successful line of play than you might believe. If your opponent ever decides to repeat the process it’s more often than not game over for them. You have to remember, giving your opponent cards doesn’t matter if all their cards suck against you. I wouldn’t often consider playing more than one maindeck, but nearly every time I’ve cast it it’s been game ending.
What would you do for four cards?
The Script
2 Remand
Flood of Recollection is an unassuming all-star. All of our spells are so powerful! Why wouldn’t you want to cast them again? Flood really slams the gas on anything and everything we want to do. Arguably most importantly it’s one of the most efficient options to rebuy your Mind’s Desire as it allows you to resolve every copy before getting it back, unlike cards like Commit or Remand. It is also an integral piece in Gifts Ungiven piles which we’ll break down here in a moment. Regrowth is a powerful Magic card. Getting access to it in blue is a beautiful thing.
Remand is arguably one of the most powerful counterspells ever printed. The biggest weakness of countermagic is having to trade one-for-one with your opponent every time. Remand makes up for this by being card neutral, with the downside of your opponent getting to do their thing next turn. But we all know how to use counterspells offensively. Using Remand defensively is where it gets interesting. For example, you’re in game two against a blue deck and they cast a Test of Talents targeting your High Tide. This cannot stand! Often your best line is to cast your remand on your own High Tide, let their Test fizzle, then just cast it again either now or on a later turn. Saving your spells from opposing interaction is an often overlooked aspect of Remand that should always be on your mind. And of course, Remand is a fabulous rebuy for your Mind’s Desire. You get to draw a card! You basically got the last copy of Desire anyway!
Solve the Equation functions similarly to a Demonic Tutor in Tide. The only particularly important cards you can’t find are Medallion and Lutri, other than that the world is your oyster. Cast it early to find a Tide, cast it mid storm turn and find your Mind’s Desire, cast it later and find the Snap or Blue Sun’s Zenith or whatever else you need to win the game. It slices! It dices! It does your yard work! It’ll treat your daughter to a nice dinner and bring her home before 11! It does anything and everything you need it to do almost all of the time. It is also yet another card that feels illegal to cast when discounted by one or more Medallions, making it even more like a Demonic Tutor.
Bond of Insight is a card that I was initially skeptical of. I knew its interaction with Lutri (which yet again, we’ll get into later) was extremely powerful but outside of the loop I wasn’t really sure what to make of it. As it turned out, the card is quite good. I never thought that all I wanted in life was two Flood of Recollections stapled together. Returning certain combinations of cards such as Frantic Search+Trade Secrets or Turnabout+Blue Sun’s Zenith or really anything else can be the last bit of velocity you need to win the game. Much like Turnabout, it is good to know that you don’t decide what you return until resolution. So your opponent can’t really stop you with targeted graveyard hate unless there’s something obvious that you’ll be getting back. Even then, they are still a slave to the top four cards of your library.
Gifts Ungiven is a card that honestly deserves an entire reference book worth of breakdown. It’s not worth it for me to delve super deep into Gifts Ungiven theory in this primer, there’s plenty of good resources at your disposal. For the sake of simplicity in this already long-winded primer I’m going to focus on the most applicable uses.
The most common use for Gifts Ungiven is finding a pile consisting of Solve the Equation, Flood of Recollection, Bond of Insight, and Mind’s Desire. This is best utilized when excess mana is available during your storm turn to give you a guaranteed Desire. The correct choice from your opponent is to give you Flood and Bond, maybe Bond and Solve if they’re assuming you are going to Solve for another flood. If they decide something wacky it’s almost certainly for a reason that you should do your best to dissect.
Casting Gifts Ungiven on your opponent’s end step to set up a winning turn is a difficult task. Specifically, if you are without access to a High Tide and tight on mana there’s not a lot of great options. If you have one or more Medallions online a similar pile to the one above to guarantee access to a Tide for relatively cheap. If not, it might be better to find a pile like Impulse, Trade Secrets, Frantic Search, and Dig Through Time to give yourself access to a minimum of three new cards (Impulse + Frantic).
The other most common basic pile for gifts is to find mana. Cloud of Faeries, Frantic Search, Turnabout, and Snap is the go-to if you have a target for Snap available other than the Cloud of Faeries you’re tutoring for. If there’s no legal targets, get the same pile with Flood of Recollection in the place of Snap to allow you to either buy back more mana or recast Gifts Ungiven itself to do a pile that more progresses you to the endgame.
Some variations of these three make up around 80% of Gifts piles you’ll find yourself building in this deck. But there are some more corner case situations that arise more often than you might think. For example, if you have access to a Flood of Recollection or Bond of Insight in your hand, it may be correct to build a pile that doesn’t have a regrowth at all in order to force your opponent to make a much harder decision. Building a pile consisting of Mind’s Desire, Blue Sun’s Zenith, Solve the Equation, and Commit//Memory when you have a decent amount of mana available gives your opponent the choice between bad and worse, when in reality you’re getting any of the cards from this pile you’d like.
On Commit//Memory: You may find yourself in a situation where the correct course of action is building a pile that simply puts Commit//Memory in your graveyard. This pile may end up being exactly Commit//Memory and placing that card in your graveyard. Other than this exact, very niche example it’s very rare you’ll want to build a pile with less than four cards. Frantic Search is a pretty safe option to include in just about every pile as a fourth card. It can put anything you get given into your graveyard while often netting you mana and if it gets binned it’s okay! You wanted the other three cards anyway.
If you want to read on this topic from a card-carrying Gifts Ungiven lover and a good friend of mine, check out Doug’s first place Tournament Report from the March 2024 Mavericks 1k. It’s a great read and he gives some valuable insight into one of Tide’s less good matchups, Thopter Sword.
The Stage
1 Sol Ring
18 Island
Sol Ring is a card that I’ve been thinking about for years. For a long time it has been very close to worth it, but always felt clunky. With the addition of Sapphire Medallion it finally earns its keep as one of the most powerful cards in the format. Getting the ability to play an early medallion with excess mana gives the deck an absurd amount of velocity it didn’t have before. Additionally, being able to cast the likes of Solve the Equation, Commit, Gifts Ungiven, and even Frantic Search earlier than you should opens up endless possibilities and makes it infinitely more difficult for your opponent to interact with you.
Islands are very powerful! They cast your spells! I’ve considered and tested some number of Mystic Sanctuaries but overall I’ve been pretty underwhelmed by it. I like it a lot more in formats like Legacy where you get access to the line of casting High Tide on your upkeep, then if it gets countered, fetching for Sanctuary and putting Tide back on top. That deck also aims to win the game around turn four, rather than turn three like we do. As is, it has always felt unpredictable and clunky. The first couple turns of the game are vital for setting up your combo that anything slowing you down can have devastating consequences. So it is best to avoid doing those things to yourself.
Winning the Game
Now that you (hopefully) understand the functions of these sacred 60 cards it’s time to put them to good use. There’s a handful of ways to achieve the ultimate goal in magic of forcing your opponent to watch you move cardboard around for one to three minutes while life drains from their eyes.
Blue Sun’s Zenith
I won’t spend particularly long discussing this card as I did so in the section above, and if you’ve forgotten please feel free to go back and read it again. The quick and dirty is that more than anything else your goal should be to put a Blue Sun’s Zenith on the stack, targeting your opponent where X=dead. But how we get there is the real meat of the situation.
Lutri
As I mentioned various times in the previous section, Lutri allows for a variety of ways to win the game. All of which involve Snap to some degree. I’ll discuss these win conditions from easiest to most difficult to pull off.
- Infinite Mana
Prerequisites: Lutri, Snap, at least one High Tide active, and at least one non-Lutri creature on the battlefield.
Process: Cast Snap targeting anything. Holding priority, cast Lutri. Lutri’s enters the battlefield trigger will target Snap. The copy of Snap will target Lutri. Resolve the copy of Snap returning Lutri to your hand and untapping two lands. Tap two islands for four mana, spending three to cast Lutri again. Repeat the process of casting and bouncing Lutri with the copies of Snap, netting one mana every iteration.
End State: Infinite Mana, Infinite Storm, all of your lands untapped, Lutri and the other creature in their owner’s hands, and Snap in your Graveyard
Note: This loop is available to do at instant speed. Attempting to storm off at instant speed is generally ill-advised in this build of High Tide, but it is certainly possible. Before going for it do remember that all of your tutors and most of your card draw (save for Frantic Search) consist of sorceries. So it is often only correct to attempt this when you have Lutri, Snap, Tide, AND Blue Sun’s Zenith immediately available.
Note: This combo does get interrupted if your opponent removes your Lutri with either version of Snap on the stack. However, it does not get disrupted if your opponent mistakenly removes the creature targeted by the original version of Snap. Spells only fizzle when they try to resolve but no longer have a legal target. Meaning the original Snap is still on the stack even after its target is gone as long as you don’t let it resolve.
- Infinite Mana pt. 2
Prerequisites: Lutri, Snap, Flood of Recollection, and at least two High Tides active.
Process: Cast Flood of Recollection targeting anything, floating one mana. Holding priority, cast Lutri. Lutri’s enters the battlefield trigger will target Flood. Holding priority with Lutri’s trigger on the stack, cast Snap targeting Lutri, floating one mana. Resolve the Lutri trigger and the Flood of Recollection copy and return Snap to your hand. Repeat this process, netting one mana every iteration.
End State: Infinite Mana, Infinite Storm, all of your lands untapped, Lutri in your hand, Flood of Recollection in exile, and Flood’s original target in your graveyard.
Note: This loop is functionally identical to the above combo. This is a sorcery speed alternative in the case that there are no other creatures in play to cast the initial version of snap.
- Bond Loop
Prerequisites: Lutri, Snap, Bond of Insight, at least two High Tides active.
Process: Cast Bond of Insight and hold priority. Cast Lutri. Lutri enters the battlefield trigger will target Bond of Insight. Holding priority with the copy on the stack, bounce back Lutri with Snap. Resolve the copy of Bond. You and your opponent both mill four and you will return Snap and any other Instant or Sorcery. Repeat this process until your opponent has no cards left in their library, netting one mana every iteration. Either pass the turn or cast a Blue Sun’s Zenith or Trade Secrets targeting your opponent to force them to draw.
End State: Infinite Mana, Infinite Storm, all of your lands untapped, Lutri in your hand, every instant and sorcery from your deck in your hand, and both players milled out.
Note: Because Bond of Insight makes each player mill it allows you to kill your opponent through effects like Blossoming Calm and Solitary Confinement,
- Winning without High Tide
Prerequisites: Lutri, Snap, Bond of Insight, Turnabout, at least 7 Islands, and at least one Sapphire Medallion in play.
Process: (Remember, all these spells cost 1 less to cast) Cast Bond of Insight, hold priority. Cast Lutri, Lutri enters the battlefield trigger will target Bond of Insight. Holding priority with the copy on the stack, bounce back Lutri with Snap. Still holding priority with the copy on the stack, cast Turnabout to untap your lands. Resolve the copy of Bond and return Snap and Turnabout. Once you untap all your lands the first time with Turnabout you can begin to float mana between every iteration of the loop. Repeat this process until the same end state as the previous win condition is achieved.
Achieving infinite mana is the easiest way to resolve a lethal Blue Sun’s Zenith, but it is far from the only one. Simply manually casting several untap effects with multiple High Tides active will quickly make you a lot of mana. If you are expecting your opponent to be holding an otherwise dead removal spell, do not invest your resources into a Lutri loop without being able to interact, as they will be able to easily shut you down. These win conditions should only be first priority when you are low on resources and it is your only way out. Focusing on manually creating mana should always be your first focus as long as even the smallest likelihood of your opponent having removal exists.
How Quickly Can I Win?
Without any interaction whatsoever from your opponent, the average turn for a successful pop-off is usually turns three or four, and as early as turn two. When we discuss mulligans I will give some examples of insane hands that can win the game super early but against most decks shooting for around turns three to five is where you want to be. Due to the nature of High Tide, it is advantageous to begin your storm turn as late in the game as reasonable and with as many Islands in play as possible so effects like Turnabout net you more mana and cards like Commit//Memory are easier to cast.
Of course, when evaluating the right time to go for it, you must also consider a whole host of factors. Potential instant speed interaction, the odds of you actually finding the pieces you need, how much mana you can make initially, etc. The later the better but if you’re under a particularly high amount of pressure or you are worried about your opponent’s ability to find relevant disruption your deck’s ability to win earlier is of great use.
Goldfishing
If there’s one piece of advice that I can give for getting used to every single aspect of this deck from the numbers and sequencing to the general physical dexterity involved in a storm deck, it’s to goldfish! Goldfish all the time. Not only is it helpful but it’s fun! I keep my deckbox within arm’s length of my living room table at all times so whenever I get the itch I can get right into some fake games. You’ll find yourself getting much more comfortable extremely quickly. It’ll make remembering the numbers above and the other weird aspects of the deck second nature. Talk through each of your game actions out loud like you would against an opponent. Get used to describing what’s happening when you present the Bond of Insight or Snap loop. The more you practice these smaller things the more confident you’ll become in your play.
Here is some basic High Tide math to remember to make your turn easier. The “mana after x spell” category is assuming you are tapping exactly the number of Islands the spell untaps. It is also only showing the amount you will have floating after resolving the spell, not taking into account the newly untapped Islands and assuming all of your Islands were untapped before you cast the spell.
| High Tides Active | Mana from individual Islands | Mana after Frantic Search | Mana after Snap | Mana after Cloud of Faeries | Mana after Turnabout (y=Number of islands you control) | Mana after Cloud of Faeries + Snap |
| 1 | 2 | 3 | 2 | 2 | (y*2) – 4 | 6 |
| 2 | 3 | 6 | 4 | 4 | (y*3) – 4 | 12 |
| 3 | 4 | 9 | 6 | 6 | (y*4) – 4 | 18 |
| 4 | 5 | 12 | 8 | 8 | (y*5) – 4 | 24 |
Once you get used to casting all of these spells during the various points in your turn the math will become much easier to do than you might think it is. It is very, very important though that you are sure your opponent 100% understands where every point of mana is coming from. If they ask any question about the process, answer as clearly as possible. If you mess up, it’s your fault. Your opponent should be able to call you out on that. In addition to your mana, make sure that you are very clearly keeping track of storm and how many High Tides you have resolved. The last thing you want is to accidentally cheat because you weren’t clearly representing important things.
When goldfishing in your free time, there is a lot to be gained from mindlessly shuffling up sevens and seeing where they go. But there is even more to be gained if you start putting yourself in arbitrary bad positions you’ll likely find yourself in. For example, your opponent casts a turn one Inquisition of Kozilek into a turn two Hymn to Tourach while you’re on the draw. How well are you able to recover from this common start? What could you have sequenced differently to make it easier? Getting used to these positions is arguably the single most important skill to have when playing High Tide. Surgical Extraction your Tides. Play around triple counterspell. Build weird Gifts piles. Any and all difficult situations you might find yourself in are worth goldfishing if only to make the decision making process easier at a later time.
Similarly, it can be tempting to goldfish your games quickly as you get more comfortable with the deck. But no matter how many games you’ve played and no matter how much of an expert you become, there is no reason you should not be taking things slowly and considering each and every one of your game actions with the same level of care you would in a proper match. Figuring how to properly sequence untappers on a game by game basis, what cards to discard to Frantic Search when, and even things as small as when to not cast that Flood of Recollection on Mind’s Desire and instead get back something else. As discussed in the section on Mind’s Desire, it is always good to take it slow and do some basic calculations on the likelihood of whiffing at each point in your turn. Specifically after you come across more dead cards from Frantic Searching or otherwise and your odds shift.
Sideboard
Philosophy
As will become apparent once we start delving into the individual matchup analysis of the sideboard there’s really only two big things that are absolutely necessary to prepare for. Our worst matchups are decks that race us, and decks that interact on the correct axis.
Decks that race us are self explanatory. If we lose the game on turn one, we can’t win the game on turn three. Being prepared for the bigger fish is vital to surviving in the Budget Vintage metagame. The latter however, requires some elaboration.
You shouldn’t be too terribly scared of interaction. You can play through and around counterspells. You also shouldn’t be too terribly scared of pressure. You can generally race most board-centric decks. When those two worlds meet is when things start getting complicated. White-based creature decks with cards like Thalia and Elite Spellbinder provide relevant disruption stapled to cards that quickly drain your life total. Similarly, control decks such as Thopter Sword are able to hold up interaction with the threat of an army of 1/1s coming in to finish the job. These types of decks make up a pretty noticeable amount of the metagame, so it’s important to be prepared.
While concocting a sideboard plan for a given matchup is it good to be mindful of not over-boarding and diluting your deck to the point where actually winning the game becomes an issue. I tend to stray away from siding in any more than five cards in a given matchup for this reason.
Deciding what to board out in a given matchup is an important and difficult decision. Like most combo decks, if we board out the wrong thing it can spell doom for our actual attempt to win the game. For this reason, it’s often best to “trim” whatever is possible. You’ll see some patterns in the matchup guide to follow such as boarding out a Sapphire Medallion or an Impulse. Dropping one of our four-ofs for a more impactful sideboard card is more often than not the safest option by far.
Note: Towards the end of this primer there is an addendum concerning a fairly massive overhaul in this deck’s strategy mostly concerning its sideboard. The discussion here is still relevant and the matchup analysis remains mostly the same, but things have changed significantly. (Hint: the change rhymes with Wunning Cish)
Breakdown
3 Disrupt
Ravenous Trap is the go-to sideboard answer for any fast graveyard deck. From Dredge to Oops, it hits pretty much all we’re worried about. I opted for Traps over a card like Soul-Guide Lantern out of necessity. The “fairer” graveyard decks are not something to be particularly worried about. Most of them operate at sorcery speed and have interaction that entirely consists of Hand Attack or on-board hate pieces which we have plenty of play for. The more “unfair” graveyard decks however are some of the only combo decks in the format able to race Tide. While we look to win around turns three or four when not interacted with, these decks are able to win as early as turns one or two. Ravenous Trap gives us play against these decks, especially when combined with other sideboard options. If you’re entering a meta that you know will not require you to pack this kind of hate, feel free to leave it at home. But you better be 111% sure that’s the case, or you’ll get punished rather quickly.
In most higher-stakes metagames, Blue Elemental Blast says “deal with target Eidolon of the Great Revel.” Burn is without a doubt the scariest red deck in the format that sees regular play. Their ability to kill you early and drop disruptive pieces like Eidolon or Pyrostatic Pillar make them a force to be reckoned with. Avoid using your Blue Blasts on anything that is not those two cards unless you are quite literally dead. Outside of Burn there’s a handful of decks that can catch strays like Obosh, Goblins, and RB Lurrus, but they’re primarily here for the Burn matchup in particular as it’s the most prevalent and arguably the most powerful. (If you want to learn more about Burn in Budget Vintage check out my primer on that deck as well)
Disrupt is a fairly recent addition to the sideboard as a result of MH3 introducing cards like Brainsurge to the format. Often feeling like a one mana Cryptic Command, Disrupt provides just enough of a speed bump for control that they usually won’t be able to develop enough interaction in time to deal with us. Additionally, it’s a very solid option in a variety of combo matchups. If you prefer a card like Spell Pierce in this slot I absolutely understand. It fills the same role in most matchups and also has the ability to counter important sideboard pieces like Damping Sphere. Personally, I’ve found Disrupt being Card neutral to be a huge game changer in a lot of situations. It may be correct that a split between the two is the path forward. I may end up doing that in the future. But unfortunately it is currently the present.
Into the Flood Maw is a brand-new addition to blue decks everywhere courtesy of Bloomburrow. I’ll be frank, I haven’t had much time to test it in this slot as at the time of writing it’s been legal for just over a week. However, the card Flood Maw replaced was the beloved all-timer Echoing Truth. And as much as it pains me to say, Flood Maw seems like a strict upgrade. Sure, Echoing Truth can bounce back multiple cards and sometimes your own Cloud of Faeries but the vast majority of the time it’s used to one-for-one your opponent’s disruptive piece. And Flood Maw takes that job and cuts the mana requirement in half. The tapped fish almost entirely does not matter, meaning you are free to have a Chain of Vapor at your disposal.
Test of Talents is one of the most powerful sideboard options in all of Budget Vintage. It is devastating against some decks and at least a nuisance against most others. Even doing something as simple as targeting an opponent’s Counterspell or Hymn to Tourach can be game changing, not to mention hitting an important combo piece like an opposing High Tide. Play as many as your heart sees fit, but play some number.
I sang the praises of Trade Secrets already so I assume you don’t need me to tell you again how powerful it can be. Against decks that already don’t have a lot of game against you, getting an additional copy of one of the most powerful draw spells in your deck can be huge. Do be more wary of casting Trade Secrets postboard though, as casting it for value earlier on can get your opponent closer to whatever sideboard pieces they did bring in against you. (But also brings you closer to finding a way to deal with it).
Much like Trade Secrets, I discussed Turnabout at length earlier. Stashing an extra copy in the board for matchups where you want to be Turnabouting your opponent or winning at instant speed allows you to make those huge strategy changes and keep your opponent on their toes. Again, I won’t talk too much about the card here since if you’ve already forgotten how to use it you can just scroll back up.
Guide
I will obviously not be able to delve into every single deck you might run into in a given event. As stated previously, Budget Vintage is a rich, diverse format with dozens of powerful archetypes popping up every day. I will instead discuss the most relevant and/or most interesting matchups that you’re likely to see. Much like every other sideboard guide ever written, this is not gospel. If your opponent’s list seems to be exceedingly different from the example lists I have below, use your best judgment.
8 Rack
Vibes: Favored
The Plan:
In: 3 Disrupt, Trade Secrets
Out on the draw: 1 Sapphire Medallion, 2 Frantic Search, 2 Remand
Out on the play: 1 Sapphire Medallion, 1 Impulse, 1 Frantic Search, 2 Remand
“What do I do?”
On paper this matchup appears miserable. A deck with 16+ discard spells seems like a death sentence. Luckily 8 Rack’s pressure doesn’t come from their disruption like a lot of other decks. It instead often comes from the titular “rack” effects. As long as you’re able to resolve one or two Trade Secrets or even a Blue Sun’s for two you should be able to keep a relatively full hand and negate the vast majority of what they want to be doing. Until they present something that is a clear and present danger, such as a manland, you’re welcome to take your time and keep casting draw spells until you feel comfortable to go off. Be wary of opposing Extirpates however, as they can force you into particularly undesirable positions.
Affinity
Example Decklist
Vibes: Very favored game one, slightly favored postboard.
The Plan:
In: 3 Into the Flood Maw
Out on the draw: 1 Impulse, 1 Sapphire Medallion, 1 Turnabout
Out on the play: 1 Impulse, 2 Turnabout
“What do I do?”
Game one is quite an easy race. As long as your opponent doesn’t end up with the nuts, you will be able to make quick work of them and their lack of interaction. Postboard Flood Maws deal with Cranial Platings extremely efficiently and can buy you a full turn on their own. Your opponent will be tempted, for good reason, to keep up interaction on every turn of the game. This is unfortunate as it can prevent us from going off as early as we would like, but it also means our opponent will likely be playing off curve and give us more time than they might mean to. As long as you keep cards like Metallic Rebuke and Spell Pierce in mind it will often be an easy task to dispose of your robot-loving opponent.
Cloudpost
Example Decklist
Vibes: Very Favored
The Plan:
In: 1 Into the Flood Maw
Out on the draw: 1 Sapphire Medallion
Out on the play: Same Strategy
“What do I do?”
Cloudpost does not get access to very much relevant interaction at all. They will sometimes be able to bring in cards like Surgical Extraction or Spatial Contortion. In the case of Surgical, they do not have access to any sort of hand attack or countermagic so you will at least be getting access to a single High Tide which is more than enough to close out a game. There have been rumblings about Post lists playing Jester’s Cap for High Tide specifically but I would not expect it on a normal day. The way Post is able to race you is almost always by creating a fast Marit Lage, but as long as you can put them off of it through offensive Turnabouts, Snaps, or a Flood Maw it’s of mostly little concern.
Combo
Creature Combo
Examples: Elves, Goblins, Devoted Druid
Vibes: The faster they are, the worse the matchup is, but generally favored especially postboard.
The Plan:
In: 3 Into the Flood Maw (1 Flood Maw and 2 Blue Blasts vs Goblins)
Out on the draw: 1 Dig Through Time, 1 Sapphire Medallion, 1 Turnabout
Out on the play: Same Strategy
“What do I do?”
For Elves? Try to interact and pray they don’t go off too quickly. If you’re able to keep a reasonable hand and stop them from developing a fast Priest of Titania or other important piece. The same strategy applies to most other creature-based combo decks and luckily the vast majority of them are significantly slower than Elves. It’s often advantageous to be the control deck in these matchups. Once they’re significantly on the backfoot you are able to take advantage of their lack of interaction and get the job done.
Graveyard/Turbo Combo
Examples: Dredge, Oops, Goblin Shoal
Vibes: Unfavored game one, only kind of unfavored postboard
The Plan:
In: Graveyard based: 3 Ravenous Trap, 3 Disrupt
Board Based: 3 Disrupt, 3 Into the Flood Maw
Out on the draw: 2 Sapphire Medallions, 2 Impulse, 1 Turnabout, 1 Dig Through Time
Out on the play: Same Strategy
“What do I do?”
Easily the scariest archetype to see across the table. As long as you keep a hand with a relatively decent amount of disruption and they aren’t able to turbo you into the ground, you can often strip them of enough resources to put them in topdeck mode which is really not where most of these decks want to be. Dodge a turn one or two win and you should be a-okay! (Hopefully)
Storm Combo
Examples: The Mirror, Crimes Storm
Vibes: Favored
The Plan:
In: 2 Test of Talents, 3 Disrupt
Out on the draw: 1 Sapphire Medallion, 1 Trade Secrets, 1 Turnabout
Out on the play: 1 Preordain, 1 Trade Secrets, 1 Commit//Memory
“What do I do?”
The great thing about the storm matchup is you’re playing (arguably) the most powerful storm deck in the format! You’re usually faster, more resilient, and more proactive than your everyday Storm deck. Because of this, the most common matchup you’re going to encounter is the mirror. This is a very strange mirror to play. Because High Tide is symmetrical you must be aware that your opponent may be able to win at instant speed on top of a pivotal spell of yours. Likewise, your opponent must be aware that you may be able to do the same thing. Leverage your offensive Turnabouts and do your best not to tap out on your turn (or at all midgame if you can help it). If you have a feeling your opponent is getting ready to go off, it may be correct to try to assemble Lutri+Snap+Blue Sun’s as opposed to a generically good storm hand to use your opponent’s tide as opposed to yours. If you are really scared about this matchup and have some money sitting around, Borne Upon a Wind is an extremely good option to help you be able to fully win at instant speed as opposed to only kind of.
Depths
Vibes: Very Favored
The Plan:
In: 3 Into the Flood Maw
Out on the draw: 1 Sapphire Medallion, 2 Remand
Out on the play: 1 Turnabout, 2 Remand
“What do I do?”
This matchup plays out much like Cloudpost in that they have limited to no options for interaction and they’re mostly just trying to create a Marit Lage as quickly as possible. One big difference you must be mindful of is Sejiri Steppe as a Crop Rotation target to save their Marit Lage from any of your bounce spells. Other than that, most of the time you’re going to be able to easily race them. They may have access to Blossoming Calm or similar effects postboard, so be sure to think about them when casting Gifts Ungiven, and prioritize the Bond of Insight loop if they’re representing a hexproof effect.
Enchantress
Vibes: Very Favored
The Plan:
In: 1 Trade Secrets, 3 Into the Flood Maw
Out on the draw: 1 Sapphire Medallion, 1 Turnabout, 1 Impulse
Out on the play: Same Strategy
“What do I do?”
Enchantress’s main win condition in game one is to sit under a Solitary Confinement for as long as possible and eventually develop a huge board with Paradox Zone. Lucky for us, this rules! It gives us plenty of time to freely sculpt the perfect hand and go off at the last possible moment thanks to our opponent’s win condition being very publicly available information. Postboard they get a little bit more game with access to cards like Rest in Peace and Nevermore but as long as you’re able to keep a generically decent hand you’ll be able to either stop these effects or just win through them.
Generic Control
Examples: Boomer UW, Wilderness Reclamation, Energy RIP, Sailor’s Bane
Vibes: Generally Even
The Plan:
In: 2 Disrupt, 2 Test of Talents, 1 Turnabout
Out on the draw: 1 Sapphire Medallion, 1 Trade Secrets, 1 Commit//Memory, 1 Preordain, 1 Snap (1 Flood of Recollection vs Energy/RIP)
Out on the play: 1 Trade Secrets, 1 Commit//Memory, 1 Impulse, 1 Snap, 1 Solve the Equation (1 Flood of Recollection vs Energy/RIP)
“What do I do?”
Your role in the control matchup often straddles between needing to go off as soon as possible to prevent your opponent from finding more interaction and needing to find a hand that properly plays through disruption. Offensively using your Turnabouts and even firing off a Test of Talents on anything from a Counterspell to a Brainsurge just to receive information about your opponent’s hand and plan accordingly. Unfortunately this is not a matchup in which I can give solid information. It is best analyzed on a case by case basis and the best way to be able to analyze the various situations these decks put you in is to simply play these matchups. A lot. Find a friend who’s a talented control pilot, strap them to a chair, and make them play hundreds of games with you.
Generic Midrange/Aggro
Examples: Mono Green Stompy, Obosh Red, Sultai Snow
Vibes: Very Favored
The Plan:
In: 3 Into the Flood Maw, 1 Trade Secrets (Against non-blue decks)
Out on the draw: 1 Sapphire Medallion, 1 Turnabout, 1 Cloud of Faeries
Out on the play: 1 Impulse, 1 Turnabout, 1 Cloud of Faeries
“What do I do?”
These are the kinds of decks you get to prey on. They can be fast, but you’re often faster. Having Flood Maws available for the various permanent based disruption these decks often have is enough to break parity postboard and put you in the same position you had in game one. These are your ideal opponents. They’re slow enough that you can wait just long enough to be certain of your win and play little to no super impactful disruption.
Hogaak Roots
Vibes: Very unfavored
The Plan:
In: 3 Disrupt, 2 Into the Flood Maw
Out on the draw: 2 Sapphire Medallion, 2 Impulse, 1 Turnabout, 1 Dig Through Time
Out on the play: Same Strategy
“What do I do?”
Dear reader, I will be entirely transparent with you. If you’re a religious individual, you should probably get to praying. Because there’s not a whole lot you can do against this particular deck. The combination of powerful hand attack in the form of Cabal Therapy and an insanely fast clock thanks to the titular Hogaak is near unbeatable. The best you can ask for is your opponent not knowing what you’re playing in game one and not keeping proper hand attack as a result and you’re still able to race their clock. Then successfully disrupt them postboard and keep an exceptionally fast hand. Other than that? Good luck bud.
Infect
Vibes: Even
The Plan:
In: 3 Into the Flood Maw, 2 Disrupt
Out on the draw: 1 Trade Secrets, 1 Sapphire Medallion, 1 Remand, 1 Impulse, 1 Turnabout
Out on the play: Same Strategy
“What do I do?”
Infect is a very board-centric combo deck. It is entirely possible they can kill you on turn two. However, it is extremely unlikely. Because of this, you can either race them or interact with them until it’s time to get the job done. Flood Maws and Disrupts do a lot of work postboard for the latter. Be aware of hexproof effects and plan your interaction accordingly. But for the most part, the plan remains the same.
Initiative
Examples: GW Initiative, RG Initiative, BW Initiative
Vibes: Unfavored vs GW, even against other variants.
The Plan:
In: 3 Into the Flood Maw, (2 Blue Elemental Blast vs RG)
Out on the draw: 1 Sapphire Medallion, 1 Trade Secrets, 1 Cloud of Faeries, (1 Turnabout, 1 Impulse)
Out on the play: 1 Impulse, 1 Cloud of Faeries, 1 Preordain (1 Turnabout, 1 Preordain)
“What do I do?”
RG Initiative is more of a race than any other initiative matchup and it’s not even particularly close. They want to play a game-ending permanent as early as turn one and force you to deal with it or lose. Luckily, we have the technology available to help mitigate this oppression a decent amount. Remands and Blue Blasts do a lot of work, especially if they’re relying on Spirit Guides and Tinder Walls.
BW Initiative gets a little bit harder. They get access to Anointed Peacekeepers, sometimes Thalias, and hand attack. All of which have the potential to be backbreaking. Luckily, outside of those options specifically, they have limited options that provide interaction and pressure, and mostly rely on just pressure. If you’re able to exploit a slower hand that wants to curve a Hymn to Tourach into a Graveyard Trespasser you’ll usually be able to go off before their 3/3s are relevant. They also fall into the category of almost never having instant speed interaction and their clock always being public information, meaning you know exactly how long you can wait before going for it.
GW Initiative is easily the worst matchup of the bunch. They combine the mana acceleration of RG and the disruptive pieces of BW into a monstrosity of power. The matchup is certainly rough, but absolutely winnable. If you’re able to dodge the Spellbinder and friends, or are able to play through/around them you should be just fine. Luckily they don’t have a ton of game out of the board so Flood Maws will do a lot of work in dealing with pesky Peacekeepers. Your best shot at victory though, is your opponent making a mistake in taking the wrong card with Spellbinder or a similar blunder. Keep your head on straight, think through all your available lines of play, and if need be just go for it even if you’re not prepared to.
Martyr
Vibes: Favored
The Plan:
In: 1 Trade Secrets
Out on the draw: 1 Impulse
Out on the play: 1 Preordain
“What do I do?”
Hey look! It’s another board-centric deck with little to no instant speed interaction! I sure do hope we’re able to beat them before they develop an overwhelming board state!
RB Lurrus
Vibes: Even
The Plan:
In: 2 Blue Elemental Blast
Out on the draw: 1 Cloud of Faeries, 1 Impulse
Out on the play: Same Strategy
“What do I do?”
Playing against RB Lurrus is much like playing against BW Initiative. They have powerful hand attack options and are often able to develop quite the threatening board state if left to their own devices for too long. Much like that matchup, if you’re able to mostly recover from a couple hand attack spells you’ll mostly be in the clear to wipe the floor with your opponent. Game one, a lot of their cards are mostly dead against you. Galvanic Discharge and Lightning Bolt specifically don’t do very much outside of killing a Lutri or Cloud of Faeries with a Snap on the stack.
Thopter Sword
Vibes: Even game one, unfavored postboard.
The Plan:
In: 2 Disrupt, 2 Test of Talents, 1 Turnabout
Out on the draw: 2 Sapphire Medallion, 1 Trade Secrets, 1 Remand, 1 Snap
Out on the play: 1 Preordain, 1 Impulse, 1 Trade Secrets, 1 Snap, 1 Frantic Search
“What do I do?”
Thopter Sword plays out much like regular control matchups with the main difference being that they are able to get their win condition online far faster than most other control decks. Because of this, you need to be on your a-game. If need be, try to assemble an instant speed win if your opponent keeps tapping out on your end step to make Thopters. In this matchup more than others using your Disrupts to prevent card advantage is pivotal. Disrupting a turn three Brainsurge is an insane amount of virtual card advantage. Your opponent is casting Brainsurge for a reason. Odds are they need more interaction against you or at the very least needs something proactive to do at all. Be very wary of Test of Talents postboard. As discussed before, it’s far from game over if your High Tides get removed but it will certainly cause you to be on the backfoot and will likely allow your opponent to overwhelm you with 1/1s.
Mulligans
Mulliganing in High Tide is not as backbreaking as it is with other combo decks, but it should very much be avoided if possible. Even some one land hands are keepable if they include a Preordain and something proactive to do after finding a second land such as a Medallion or an Impulse. When deciding mulligans, it is ideal to keep in mind the probability equations we discussed earlier in this primer. With a single preordain, especially on the draw, you will likely be able to find a second mana source. After that finding more mana and establishing your engine can be extremely simple. That being said, if the rest of the hand is going to be slowed down by potentially needing to bottom gas off preordain, ship it. You will likely get shot down by whatever your opponent’s doing before you can really get running.
When evaluating opening hands you are looking for a handful of things:
- Mana. It goes without saying. You need mana to cast your spells. Whether it be multiple islands, Sapphire Medallion, Sol Ring, whatever. This deck more than most needs a decent amount of mana to get started so not having it at all is a non-starter. (Unless the rest of your one-lander is very good as we just discussed)
- Card Advantage. From Impulse to Trade Secrets we have no shortage of card advantage and card selection to choose from. Unless you’re looking at seven cards that win the game extremely early it’s not worth the risk to keep an opener that doesn’t give you some number of options from the top of your deck.
- Untappers. Incredibly distinct from regular mana, it is best to have your untappers in your opening hand as opposed to looking for them through your cantrips. They will be susceptible to hand attack, but thanks to the abundance of options you have available in conjunction with effects like Flood of Recollection you’ll end up being pretty okay with your opponent opting to take those instead of something more relevant. This way, you’ll be able to use your cantrips to find the important things and you’ll be more willing to take another Impulse from your Impulse instead of taking a weaker card in the moment. Additionally, it allows you to go off almost immediately after finding a High Tide which is extremely important. Opening up your Tides to as little interaction as possible can be a life saver. Passing the turn with one in hand against a deck with hand attack can be devastating. That being said however, the last option we want to see is:
- High Tide (Or Sapphire Medallion). Yeah playing against a potential turn one Inquisition of Kozilek is rough. But if your opponent doesn’t have access to discard spells there’s few cards we want to see more than the one the deck is named after. If we’re in a position where we need to go off as early as possible it is much more efficient to spend our first couple turns looking for cards that we have 10-12 copies of as opposed to a card we only have 4-8 copies of.
Example Hands
In this section I will be presenting you with a handful of common opening hands alongside whatever relevant information you may have access to at the moment. I will be giving my breakdown as to what I think of these hands, but I encourage you to form your own opinions as we are nearing the end of this primer and you are becoming a High Tide master.
Context: Game one, on the play vs an opponent who is on mono green Oops! All Meng Huos!
Evaluation: Boy howdy that’s a hell of a hand!
Gameplan: Alright alright I wanted to put this first to show off what a hand that wins on turn two looks like since I mentioned it way back. The line of Tide – Cloud – Tide – Snap – Cloud – Solve – Mind’s Desire gives you a Desire for 7 with plenty of mana left over. While it is quite risky to make a win attempt this early due to the high chance of finding absolutely nothing off of your Desire. However, if you’re able to find even a single Impulse or Trade Secrets you’re off to the races. Now that we’ve got this out of the way, let’s discuss some more interesting hands.
Context: On the draw, opening seven, game one, vs an unknown opponent.
Evaluation: It’s slow, but it’s reasonable.
Gameplan: Curving Preordain into Sapphire medallion is an extremely powerful way to begin the game. That being said, other than that this hand doesn’t have a ton going for it. An early Solve can find High Tide to help get the ball rolling but after that you still need to find gas off of Preordain and Impulse and you may need to do so relatively quickly depending on what your opponent is up to. In the blind I don’t mind keeping it, but if you know that your opponent is playing any sort of fast combo or is packing turn one hand attack it’s perfectly reasonable to try to find a six that better deals with that situation.
Context: On the play, mulligan to six, game two, vs Infect
Evaluation: Deceptively Mid
Gameplan: Leading with a turn one Medallion is undeniably a powerful place to start a game of magic. The amount of advantage that gives you is unmatched. However against a deck like Infect we really need to be absolutely certain we can handle whatever they plan on throwing at us. This hand does a decent job thanks to Snap, but if they have more than one threat in a row we might end up in a situation where we’re expending a Solve or Bond just to find another way to deal with our opponent. All that being said, this is almost certainly better than most fives. So what are we putting back? Probably Mind’s Desire. We get access to the line of Snapping our opponent’s threat, untapping and Solving for a combo piece. After our opponent replays their threat we can bond back Solve + Snap and do the same thing again. Hopefully we’ve been able to time our Snaps so our opponent has expended their resources and whatever we end up needing to find off Solve the Equation will be enough.
Context: On the play, opening seven, game three, vs BW Initiative
Evaluation: Probably not quite enough.
Gameplan: It is a fatal flaw of mine that I will always evaluate an opening hand in terms of the worst possible scenario. If the game plays out with an opposing turn one Inquisition into a turn two Hymn (met by Remand) only to lead to a turn three hymn instead which rips apart an already middling hand. Once they put the pressure on after doing so we’re left with few options. This situation does get worsened by only having six cards available, but having six relevant and powerful cards rather than Seven do-nothing cards will give you a far higher chance at greatness.
Context: On the play, mulligan to five, game two, vs GW Initiative
Evaluation: It ain’t much, but it works.
Gameplan: Going to five against one of our rougher matchups is definitely not ideal, but I trust you knew what you were doing when you put back those first two hands. Luckily this hand is fairly resilient. Flood Maw and remand help immensely in preventing your opponent from developing pressure and forces them to make less than ideal choices on cards like Anointed Peacekeeper. If they don’t name Flood Maw, it just gets bounced back. But if they do name Flood Maw, they don’t get to interact with your spells that actually matter. In this case I’d probably end up putting back Mind’s Desire and Remand. High Tide + Frantic Search is a great way to start a combo turn off, and again Into the Flood Maw is a hell of a magic card.
Context: On the draw, opening seven, game two, vs Thopter Sword
Evaluation: I don’t hate it!
Gameplan: First of all, congrats on winning game one against Thopter Sword. It’s definitely a difficult one but you pulled it out at the last minute. I don’t mind this hand at all! Being on the draw makes leveraging Disrupt a bit harder but if you’re able to eat a Brainsurge or Archmage’s Charm you’ll put yourself in an extremely advantageous position. Bond of Insight also gives a lot of options if you cast Frantic Search to go digging as opposed to saving it for your combo turn, returning any of the cards you might have to ditch off of it. Overall, there’s a lot of worse situations to be in and it’s probably worth a shot.
Cards I’m Not Playing
There are close to infinite ways to build a High Tide list that can win tournaments, my 75 is just one of them. I’ve made a huge number of concessions and decisions to arrive at the list I play today, but there are a notable handful of cards I’ve chosen to omit. Cards like Treasure Cruise and Mystic Sanctuary that I mentioned earlier will not be discussed here.
- Founding the Third Path/Mission Briefing: These are the cards that I am closest to including over a Flood of Recollection. I lean more towards flood personally due to its ability to pick up a Mind’s Desire and make it available for further rebuys and shenanigans, which Founding and Briefing do not thanks to exiling it. However, including one of them does allow for more efficient Gifts Ungiven piles and has the niche use case of dodging an Anointed Peacekeeper naming a different regrowth.
- Temporal Fissure: There have been a number of decks that have registered Temporal Fissure and done very well! It is a card that I respect but I also see as a bit of a trap. The mindset behind it is that resetting your opponent’s board is a great gameplan if you can’t win the game on the spot. A sentiment that I ultimately agree with, but would much rather play a card in this slot that does help me win the game instead.
- Brainstorm: One of the most powerful cantrips in the history of Magic, Brainstorm doesn’t really do a whole lot in the Budget Vintage format. Thanks to our lack of fetch lands, it doesn’t really provide the same level of card selection that it does in other formats. This in addition to being restricted and a dollar makes its inclusion very hard to justify. It does feel good in situations where you just need to go a few cards deeper to find action but other than that, it doesn’t quite make the cut.
- Fae of Wishes: Similarly to Temporal Fissure, there have been multiple High Tide decks riding Fae of Wishes to victory, but it has always felt just a little too clunky for me. I tested the card a lot and found that I had far more success and consistency in just playing more draw spells and tutors. There’s not a lot that we particularly need to hide in our board for game one. By the time we’re able to get the silver bullet pieces available to us, we’re likely already dead. There is a real discussion to be had about the win condition of drawing your deck and wishing for Jace, Wielder of Mysteries and ignoring your opponent entirely but that is not a line that has ever particularly interested me.
- Reenact the Crime: I’m mostly using this as an excuse to plug Haidle’s extremely rad “High Crimes” list. It’s built around the powerful interaction of Reenact the Crime and spells like Frantic Search and Pore Over the Pages to recast powerful spells like Aminatou’s Augury. I can’t suggest checking this list out enough. I won’t go into it too much both because this primer is already long enough and because that deck deserves a breakdown of its own from the man himself.
Decklist Edits/Addendums:
In this section I will be documenting all major changes to High Tide after the initial writing of this primer in August of 2024. I will not be documenting every small change to the 75 as I am constantly testing new sideboard options, cantrip price spreads, new hot tech, and whatever else. Whenever there is a massive change to the strategy or an important new card gets introduced I will add a timestamped decklist and discuss the changes as well as the mindset behind them. I will not be editing any of the above primer as the teachings in them are all still relevant to the strategy as a whole, so further evolutions on the archetype will be documented here. I linked it before, but this is the list I am currently playing in paper.
November 18th, 2024
Maindeck:
Out:
-4 Preordain
-1 Blue Sun’s Zenith
-1 Island
-1 Trade Secrets
In:
+4 Sleight of Hand
+3 Cunning Wish
Sideboard:
Out:
-3 Disrupt
-3 Into the Flood Maw
-2 Blue Elemental Blast
-1 Trade Secrets
In:
+2 Echoing Truth
+1 Mission Briefing
+1 Snap
+1 Wipe Away
+2 Remand
+1 Rebuild
Changes Breakdown
With the introduction of Cunning Wish thanks to Mystery Booster 2 and the rising price of Sapphire Medallion, the deck was due for an overhaul. I will do an in depth breakdown of Cunning Wish in the following section, for now I’m just going to talk about the philosophy behind the changes.
Maindeck:
As mentioned way back when we talked about Preordain for the first time, Sleight of hand does a pretty solid impression of the powerful cantrip. Unfortunately the days of 25 cent Preordains are gone thanks to its unbanning in Modern, so in order to play the most powerful cards possible we have to make some concessions. It hurts consistency a little bit but in the long run it’s not too bad.
A Blue Sun’s Zenith, Island, and Sapphire Medallion were cut for 3 Cunning Wish. After significantly more testing I became very comfortable with the idea of going down a land. Initially I was playing with a few copies of Lórien Revealed and a Mystic Sanctuary but decided that the budget was better spent on keeping in Sapphire Medallions. Notably Blue Sun’s Zenith wasn’t really cut, it just changed. Which brings us to…
Sideboard:
We’re a Cunning Wish deck now! That means we get to play a lot of cool cards. Stuff like Into the Flood Maw just simply got priced out thanks to it becoming a multi format staple. And other cards likeTrade Secrets and Blue Blast either conflicted with wanting a variety of Wish targets or just didn’t have enough of an impact to justify their price point.
Snap and Echoing Truth are familiar favorites, being able to have wish targets that both deal with a problematic permanent on your opponent’s board and get your engine going is indispensable. Snap is often going to be the first card you Wish for alongside the always relevant Turnabout to help get your storm turn off the ground.
Rebuild and Wipe Away join Ravenous Trap as powerful wish options and targeted sideboard hate pieces. Wipe Away specifically is integral to dealing with cards like High Noon or Damping Sphere while facing down counterspells. The specifics on when to board in your hate vs when to keep it wishable is complicated, so we’ll save that for the Cunning Wish specific discussion.
I originally didn’t have any more than the two maindeck copies of Remand in my list, but after playing at the SCG Columbus 1k earlier this month I’ve changed my tune. So often Remand feels like a Time Walk. Every game I cast it I felt unstoppable, and every game I lost I wish I had it available. It is not a particularly effective Cunning Wish target, but in certain matchups having access to it as a regular sideboard option can be the deciding factor.
Lastly, Mission Briefing and Drown in Dreams. Both are fairly self-explanatory. Mission Briefing is a wishable rebuy for anything your heart desires. It doesn’t come up super often but when it does it’s suddenly the best card in your entire 75. Drown in Dreams is our new cool Blue Sun’s Zenith. While not shuffling into your deck on resolution means that targeting yourself for value holds slightly more risk and you have a sleight hoop to jump through, the full dollar you save from the swap means access to some of your more powerful spells, which is far and away worth the downside.
Cunning Wish
Cunning Wish is a card that I admittedly need more reps with. I played the card a long time ago so picking it back up has been a real treat, but not without its headaches. Figuring out the timing of when to wish for your value/interaction or when to hold them for your game winning storm turn is something that only comes with experience. I did some amount of breakdown of the new tech above, but there’s some old favorites that play nicely with Wish as well. Having access to Test of Talents and Turnabout at a moment’s notice against Control can feel like cheating at times.
One of the biggest hurdles for Cunning Wish is figuring out when it’s correct to board in your wish targets. It would be dishonest of me to tell you that I have learned the secrets of these intricacies. It’s a very complicated dynamic. But most of the time it’s a “you know it when you see it” type of thing. For example, Boarding in your Ravenous Traps vs Dredge is almost always going to be better than wishing for them because you may not even find yourself getting to three mana to begin with. A similar conclusion can be made with cards like Wipe Away or Echoing Truth. If you are mostly certain your opponent will be boarding in some number of problematic permanents, you’re almost always better off dealing with those cards as quickly as you possibly can before they either kill you or develop so many resources you’ll never get the chance to go off. Be smart, don’t overboard, think it over.
Finding the right time to cast your Wish is just as important as choosing the right card from your sideboard. More often than not you’ll find yourself wishing in one of four situations. Your opponent’s end step, mid storm turn for value, as the second to last spell of the game, or to win a war on the stack. These are far and away the most commonly correct times to be casting your wish, but it’s a card that you must keep in mind every single time you gain priority. Think of your wish as a wildcard. You get to choose for it to be anything you want from a list of ten different cards. More often than not one of those cards is going to have a lot more impact than you might think.
The last thing worth discussing with Cunning Wish is also my favorite part. The shenanigans. Most importantly, boarding out High Tide. Cards like Surgical Extraction, Extirpate, Necromentia, Lost Legacy, and Test of Talents are sideboard staples that run rampant through the top tables. The vast majority of the time your opponent will be using these cards to try to deny you access to your High Tides. The easiest way to combat this issue is to hide a copy of High Tide in your sideboard to Wish for and keep protected from these kinds of interaction. Notably, your opponent should be using these effects to exile your Cunning Wishes, not your Tides. If this does happen you can still win the game with Lutri/Bond loops, but it does swiftly cut off your easiest avenue to victory, so keep that in mind. If you do find yourself against an opponent that knows to hit your wishes first, it is in your best interest to do the opposite strategy with your Drown in Dreams/BSZ. Bring it back into your maindeck like previous versions of the list and make their worry about Cunning Wish slightly less relevant.
Similarly, there is something very important that you should keep in mind while playing High Tide that I neglected to mention previously. Your opponent likely doesn’t have the in-depth knowledge on the archetype that you do. If you just look like you’re winning the game, sometimes that’s enough. For example, let’s say you’re playing game two against a control deck. You’ve found yourself in a position where you discarded Lutri to a Frantic Search and it got eaten by a Soul-Guide Lantern. Not only that, but early on your opponent was able to sneak in a Test of Talents to get rid of your Cunning Wishes. Now what? You have lost access to your mana payoff and your Bond of Insight loops. Easy. Go through the motions. The vast majority of opponents who aren’t paying 100% attention will scoop to a relatively large Mind’s Desire whether or not it even does anything. Be confident in everything you do. Never show defeat.
March 9th, 2025
Maindeck:
Out:
-3 Sleight of Hand
-2 Sapphire Medallion
-1 Sol Ring
In:
+4 Preordain
+1 Flusterstorm
+1 Treasure Cruise
+1 Island
Sideboard:
Out:
-3 Ravenous Trap
In:
+1 Test of Talents
Changes Breakdown
This was the list that I won the SCG Charlotte 1k with and I’m still very happy with this build. There’s still a lot of work to do on the deck, but I do feel that I made the right call for that event specifically, and likely for the metagame overall moving forward.
First off, no more Medallions! Sapphire Medallion is an undeniably powerful card, but as it’s been rising in price I’ve had to make an executive decision on how worth it the card actually is. While Medallion offers a huge amount of velocity in the early game, with every turn that passes it becomes a worse and worse topdeck. In a lot of games it felt kind of “win-more” and while I do like winning more, not so much for $4 a copy. Because I decided to cut down my medallions, I also came to the conclusion that Sol Ring wasn’t quite worth the slot anymore. With the card already sitting at a relatively hefty $1.50 price tag, no longer having the powerful play of slamming a medallion while still having access to all my blue mana means the floor of power level for the card falls off dramatically.
I know what you’re thinking. “Gee whiz Everett, you sure did save a lot of money by cutting those medallions? What on earth did you spend it on!?” I’m so happy you asked! I tried a variety of different price spreads from a wish target Brain Freeze, to Mental Misstep + Gitaxian Probe, Merchant Scroll, additional Solves, and so many more. Eventually I decided on replacing the Sol Ring and Medallions with a Flusterstorm and a Treasure Cruise. Treasure Cruise is self explanatory. I wasn’t on it initially in order to not have to fight over the graveyard with Dig Through Time. However at a certain point I realized that the deck playing four copies of Frantic Search is able to pretty consistently enable both cards. Flusterstorm on the other hand, took some tanking. I knew going into the SCG Charlotte 1k that Cascade Rhinos was going to be an extremely popular deck. That alongside opposing High Tide decks made me consider playing a Spell Pierce in the main, but I opted instead to run the super mega spell pierce in Flusterstorm. While it does miss some notable spells like Damping Sphere and High Noon, I have access to different spells in my wish board for problematic permanents. I spent the last bit of cash I had on a playset of Preordains and threw in the 18th island since I was down a mana source.
Arguably the single biggest change to the list sits comfortably in the Sideboard. Borne Upon a Wind. If you plan on playing High Tide in the future, feel free to use whatever maindeck you desire. But I cannot stress enough how unbelievably powerful this card is. I initially put it in my board as a wish target to be the “mirror-breaker”. While it is indeed fantastic in the mirror, I quickly discovered that it had so many more applications. Being able to win in situations like in response to a Wilderness Rec trigger, your opponent tapping out on your end step, with a card like Treasure Cruise or Memory Deluge on the stack, after your opponent goes to cast a High Noon off of their cascade trigger, and so many more. Without a doubt the biggest problem this deck had was predictability. Previously, it was always pretty clear when Tide was about to go off. There were certain moments and breakpoints that were optimal to begin your storm turn with that most opponents are at least subconsciously familiar with. But now with Borne you can wait for the absolute premium opportunity to kill your opponent no matter when in a turn it is.
In addition to Borne I decided to play one Unauthorized Exit (for Meddling Mage on Snap/Echoing Truth) and the third Test of Talents (it’s insane). In exchange for these cards I decided to trim all of my Ravenous Traps. I decided to not respect graveyard decks for that event and it ended up mostly being the correct call. Dredge doesn’t get Poxwalkers anymore which means I can race them, the budget for Oops is all over the place, and it doesn’t really do much vs the graveyard decks that I am scared of like Hogaak Roots.
October 26th, 2025
Maindeck:
Out:
-1 Flusterstorm
-1 Gifts Ungiven
In:
+1 Bond of Insight
+1 Sleight of Hand
Sideboard:
Out:
-1 Echoing Truth
-1 Test of Talents
-1 Rebuild
-1 Drown in Dreams
In:
+1 Gigadrowse
+2 Spell Pierce
+1 Stroke of Genius
Changes Breakdown
The changes made for SCGCon Baltimore were made over the summer of 2025 and were relatively simple choices. Gifts Ungiven got unbanned in commander, spiking the price a relatively decent amount, and Flusterstorm similarly has been creeping back up. Gifts Ungiven became an additional copy of Bond of Insight which has felt quite good. Having a second copy means that firing one off for value early on isn’t as sketchy as it used to be, and it makes finding a copy to loop later much easier. Flusterstorm became an additional cantrip in the form of Sleight of Hand. If the budget allows, this could very easily be a copy of Ponder. Ponder loses a lot of percentage points without fetchlands, but there’s enough deck manipulation around that one or two copies is usually pretty powerful.
The bigger changes happened to the wishboard. Rebuild has become a pretty unnecessary option when decks like Affinity are such a positive matchup anyway. While it does have the bonus mode of bouncing a Damping sphere, so does literally any other more generic bounce spell. On the topic of bounce spells, I’ve trimmed down to just one Echoing Truth. Four bounce spells has ended up feeling like the right number. (Truth, Snap, Wipe Away, Unauthorized Exit). It’s often correct to board in two or three and leave the rest of them tucked away to be wished for. (Usually boarding in Truth and Exit).
Three Test of Talents has consistently felt like too many, leading to awkward overboarding vs the mirror/control decks, and it’s just a little too slow for decks like Rhinos. The third Test and the aforementioned Rebuild both became Spell Pierce to help fight against faster combo decks and more efficient tempo decks like spirits. And finally, Stroke of Genius is functionally identical to Drown in Dreams but a couple cents cheaper.
Overall these changes aren’t super substantial, but the lines of play do change a little bit without access to the interactive piece of Flusterstorm and the tutor power of Gifts Ungiven. At this point the list is different enough from the version written about in the main primer that I might overhaul the whole thing.
Closing Thoughts
I hope this primer was of some use to you, and I hope it inspires you to sleeve up some Islands yourself in the future. As I assume has been made abundantly clear, High Tide is a deck that I love very dearly and allows for some really unique deckbuilding decisions and interesting lines of play. It’s one of the many decks in the Budget Vintage format that is ever evolving with the metagame and as key pieces get reprinted and new tech gets introduced. It’s an incredibly powerful deck that if played well, will take you very far.
If you’ve somehow made it this far and you’re not in the Budget Vintage discord, now’s the time to do that. If you’ve enjoyed reading this primer then check out the Budget Vintage Wiki! There’s more primers, tournament reports, decklists, and more at your disposal. We have some extraordinarily talented deckbuilders and players brewing day in and day out and giving out their knowledge and lists for free! You really can’t beat that.
Thank you very much for reading, if you have any questions about any of my ramblings or just about the format in general you can find me in the Budget Vintage discord (@a_balanced_breakfast.) at any given time of day. More than anything, thank you for being a supporter of Budget Vintage. Your enthusiasm matters! A format is nothing without its players. Thank you again for reading and I hope you learned a thing or two. Good luck out there, see you in the finals.
Works Cited
Chapin, Patrick. Next Level Magic: A Guide to Mastering Magic: The Gathering. RIW Hobbies, 2014.
Linn, Doug. First Place with UW Thopter Sword. 1k Tournament Report. 23 March 2024. Budget Vintage Wiki, Doug Linn, https://valuevintage.miraheze.org/wiki/Tournament_Reports. Article.